Setting up mail forms via SMTP in phpBB
Tutorials • Aplicații | smtp | mail | phpbb | authenticationIntroduction
This tutorial explains how to set up SMTP mail forms in phpBB.
Requirements:
- A valid hosting account and domain.
- phpBB application installed on the hosting and access to its admin panel.
- A mailbox created in the hosting panel that will be used for sending emails.
Steps to follow:
- It will access the administration page of the phpBB application, where we will use the login data in its platform.

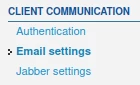
- On the main administration page, from the General tab, access the Email settings menu in the CLIENT COMMUNICATION section, located on the left side of the page.
- In the page something will be displayed, we will set the forms as follows:
General settings section
1. Enable board-wide emails choose the Enabled option to allow sending emails

2. Users send email via board choose the Disabled option so that forum members cannot send emails under the signature of the website address.
![]()
3. Email package size a value as low as possible is recommended in order not to overload the email server.
![]()
4. Maximum allowed email recipients a value as low as possible is recommended in order not to send a single email to a large number of recipients, which may lead to overloading the mail server, in the event that a single address from the chosen ones cannot receive that message from several reason.
![]()
5. Contact email address fill in the email address from which the messages will be sent.
![]()
6. Contact name fill in the name that you want to be displayed when receiving an email by the recipient.
![]()
7. From email address fill in the emails address from which the messages will be sent.
![]()
8. Force from email address is set to NO.

9. Email signature fill in the details of the signature that you want to appear in the email sent.

10. Hide email addresses it will be set according to preference whether or not to hide email addresses.
![]()
11. Send a test email through this function a test of the functionality of the settings can be made after the procedure is completed.

Section SMTP settings
1. Use SMTP server for email will be set to Yes to be able to use the SMTP sending protocol.
![]()
2. SMTP server address fill in the name of the email server in the form mail.domain.ro.
![]()
3. SMTP server port the port related to the secure SMTP connection service 587 will be filled.
![]()
4. Authentication method for SMTP the LOGIN method will be selected.
![]()
5. SMTP username the user of the email box from which the messages will be sent will be filled in.
![]()
6. SMTP password the password of the email box from which the messages will be sent will be filled in.

7. Verify SSL certificate the Yes option will be set for email traffic to be carried out using the SSL secure method.
![]()
8. Verify SMTP peer name the Yes option will be set to verify the connection to the email server through the secure SSL protocol.
![]()
9. Allow self-signed SSL certificates the No option will be set to allow operation only through an SSL certificate issued by a competent authority.
![]()
- After completing the settings, press the Submit button at the bottom of the page.
